
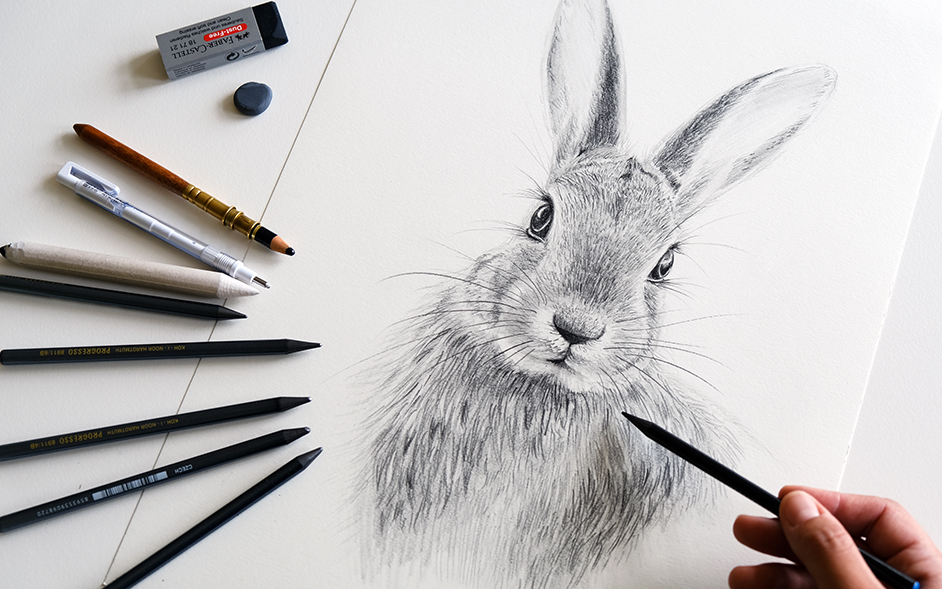
16 Mar Draw a rabbit with pencils
Learn how to draw a beautiful rabbit with pencils
Step-by-step instructions + video tutorial
You’d like to know how to draw a rabbit with pencils? Perhaps you have always wondered how to draw realistic fur? You think drawing fur is complicated and only suitable for more advanced artists?
If so, I would like to show you otherwise and give you some tips so you can easily reach your goal. With these step-by-step instructions I hope to provide you with an easier strategy to use when drawing other animals!
Rabbits are such beautiful animals – with their long eyelashes, big round eyes and fluffy fur they are very popular in every respect. The fact that they are rarely seen in nature (at least where I’m from) in our latitudes) makes them even more interesting. With their gentle charisma and aesthetic, they are of course perfectly suited as a drawing motif.
About me
I’m Sabrina Hassler, an illustrator and artist from Austria. My areas of expertise include detailed pencil drawings and I love depicting both people and animals. I work with many publishers and advertising agencies any many of my illustrations appear in books or on various products. Apart from drawing, I enjoy sharing my knowledge and techniques with other creative people. On my blog I give drawing tips and tricks and helpful resources for you to practise what you have learnt. Take a look at my portfolio of different works.
But enough about all of that – let’s draw a rabbit!
Materials:
- Pencils ranging from H-6B (e.g. from Koh-I-noor or Faber Castell)
- A black colouring pencil (I use the Faber Castell Polychromos)
- Tissue or cotton bud
- Eraser or eraser pencil (z.B. Mono Zero from Tombow)
- Sketching paper (ideally at least 250 g/m²)
Preparation:
Before you draw your rabbit with different pencils, print out a black and white photo of a rabbit. The photo I used as a reference was taken by the wonderful photographer Deena Sveinsson. Here is a link to the photo .
These are the steps to draw a beautiful rabbit with pencils:
Here’s a quick overview of the steps we’re going to explore further later:
- Sketching out the lines
In the first step we must map out the lines for the drawing.
- Completing the sketch
By breaking down the motif in the first step, completing the sketch is now much easier. We’ll also draw the eyes mouth and nose.
- Light shading
In the third step we can start shading our drawing.
- Darkening
Next, we’ll go over the dark areas with a softer pencil.
- Blending
With a tissue or a cotton swab we can blend the graphite to make it look smoother.
- Erase highlights
Next, we’ll use an eraser pencil to bring out highlights.
- Drawing fur
Then we can draw in individual hairs.
- Contrast
By using a black colouring pencil we can create even more contrast in our drawing.
- Details
In the last step, we’ll add some details to make the rabbit look more realistic.
Video tutorial: How to draw a rabbit with pencils
And if you’re more of a reading-kind-of-person – here are your written instructions:
1. Sketching out the lines
In the first step we must map out the lines for the drawing.
TIP: When sketching, use a H or HB pencil, making sure not to press too hard. This way you can easily erase guidelines and errors afterwards.
At first, the rabbit’s head can seem quite complex, but if you break down the motif into geometric shapes, you can easily map out the construction lines for your drawing.
Draw a long ellipse in the middle of your paper for the rabbit’s face.
Next, draw two more ellipses as ears, which start in the upper third of the first ellipse and protrude slightly outwards. Use your printed photo as a guide to get the angle of the ears right.
Another ellipse (this time drawn horizontally) marks out its cheeks.
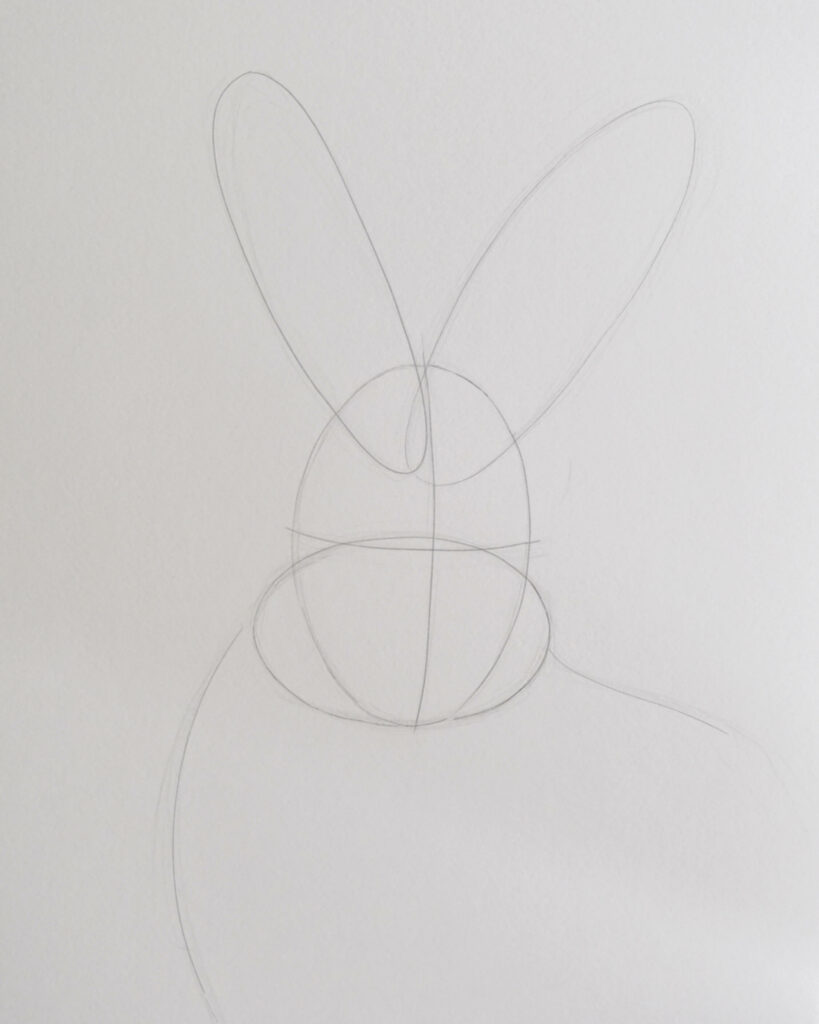
TIP: Break your motif down into simple shapes. This will help you to get the proportions right. This works for every motif!
In my sketch you can also see that the head is divided by a cross in the middle. The horizontal line shows you exactly where the eyes will be, and the vertical line is a guide for the centre of the face. This will help you later when drawing eyes, nose and mouth.
You can also draw the rough outlines of the body. Have a look at my sketch to see what I mean.
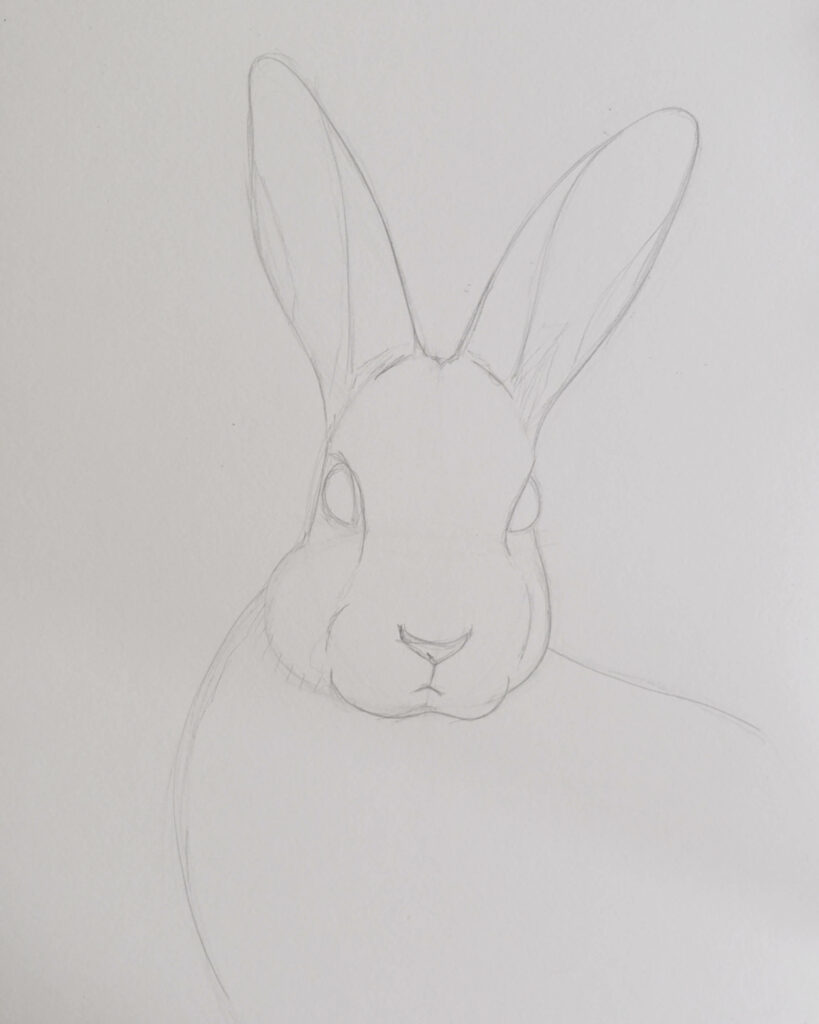
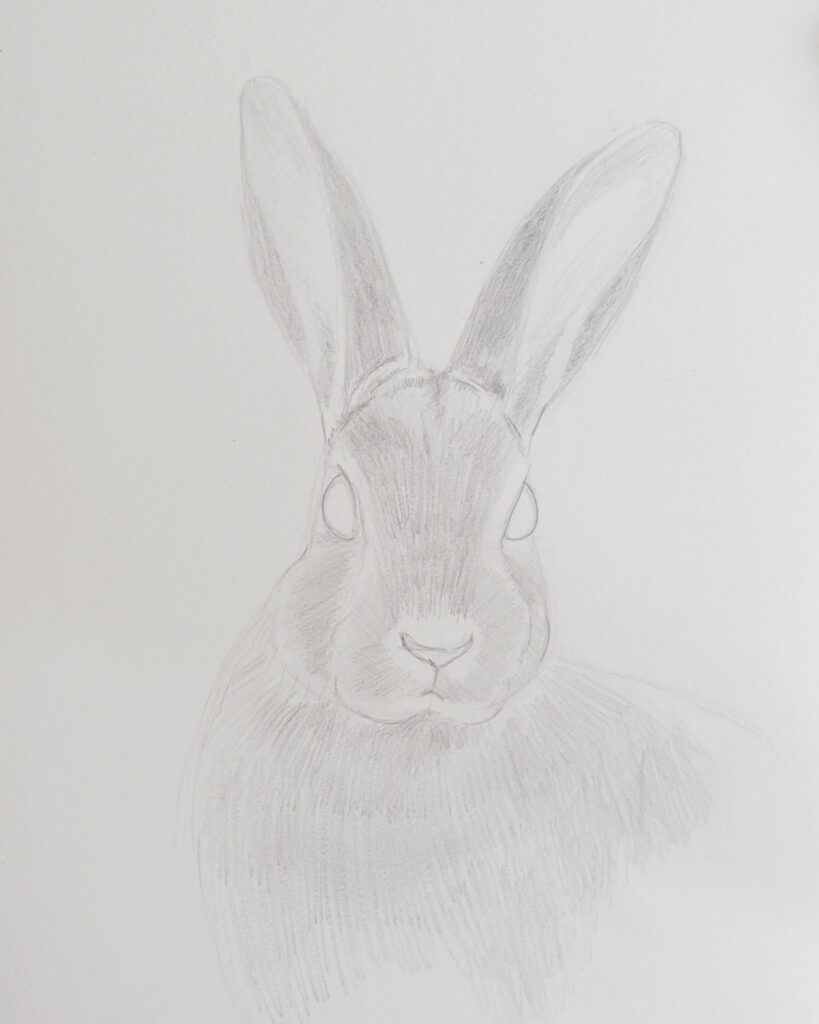
2. Completing the rough sketch of the rabbit
By breaking down the motif in the first step, completing the sketch is now much easier. Now draw the eyes, nose and mouth (and the soft chin) of the rabbit. Use the cross in the middle of the face as a guide.
Next, lightly soften the contours of your rabbit to make them flow. Imagine the ellipses melting into one another. Adjust the shape of the ears accordingly. If you look closely, you will notice that the ears are tapered at the top and are not perfect ellipses.
Once you are satisfied with the sketch, erase all construction lines.
Your sketch should look something like this:
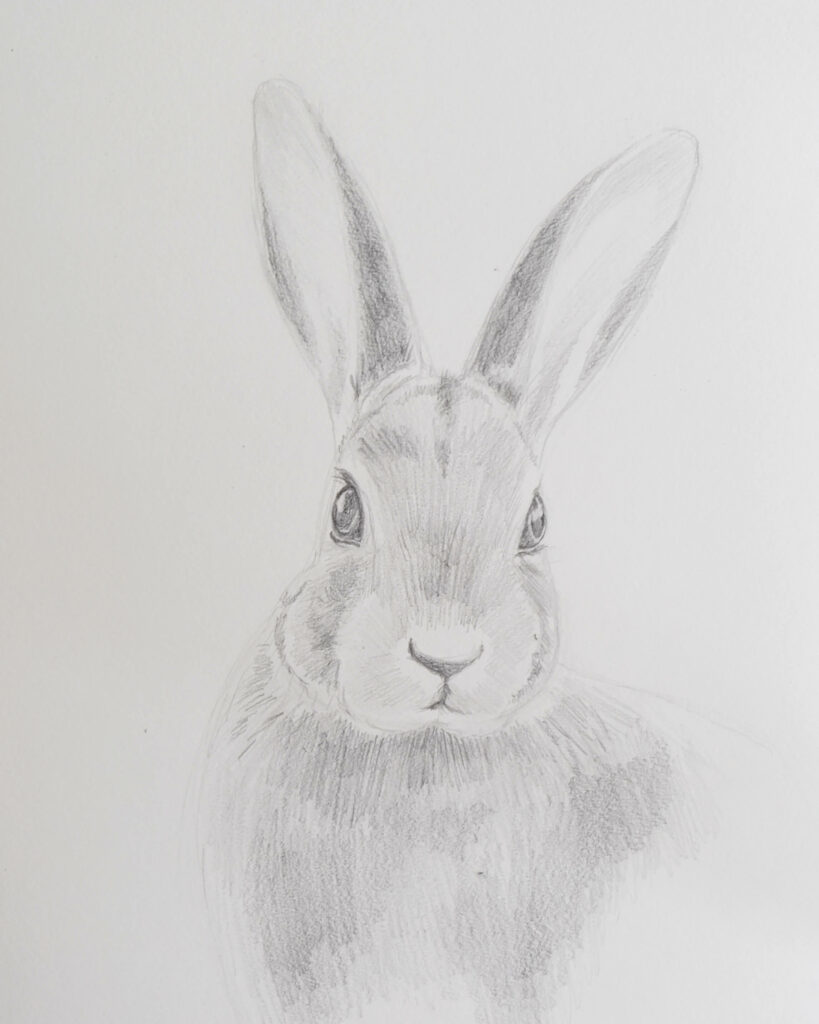
3. Light shading
We can now start to shading.
Take a close look at your printed photo and try to narrow down the medium dark and darkest areas of the photo. After all, the photo is made up of many different shades of grey – now concentrate only on these medium and darkest shades of grey. Fill in these areas on your drawing with a pencil. It is best to use an HB or 2B pencil. Be careful not to make these areas too dark, because you can add more later.
Leave the lighter areas in the photo blank (e.g. around the eyes or middle of the ears).
4. Darkening
In the next step, take a softer pencil, e.g. 4B, and go over these very dark areas again.
Which areas look almost black in the photo?
These are the areas you should be focussing on with your pencil. These are, for example, the eyes (note: leave out the highlights!), the nose, the mouth and the inside of the ears.
NOTE: A soft pencil contains more graphite than a hard pencil and is therefore darker – it is also more difficult to erase.
5. Blending
Next, use a scrunched-up tissue or cotton swab to smooth out the edges.
Gently wipe over your pencil strokes to make them softer and more even.
This way, even the smallest gaps between the strokes are filled in with a little graphite and the drawing looks much less rough.
If you wanted to achieve a rough look, you could always skip this step.
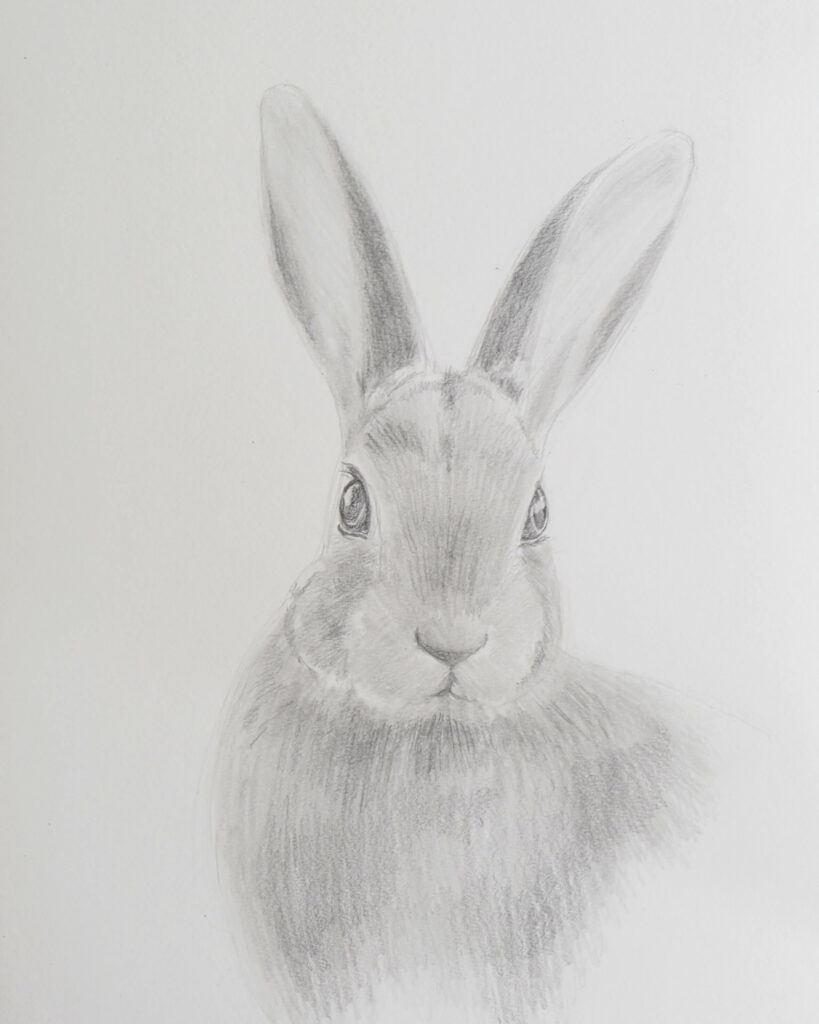
6. Erase highlights
For step number 6 you need an eraser pencil or a pointed eraser. I can highly recommend purchasing an eraser pencil, which you can use to erase single strokes very precisely.
Now take another look at your reference photo and identify the brightest areas. You might have blended into these areas with your tissue or cotton bud in the previous step.
Therefore, you should now touch up the edges with your eraser of choice. On my drawing you can see which areas I have gone over with an eraser.
The practical thing about an eraser pencil is that you can use it to erase individual hairs. Erase lighter hairs individually to achieve a realistic effect.
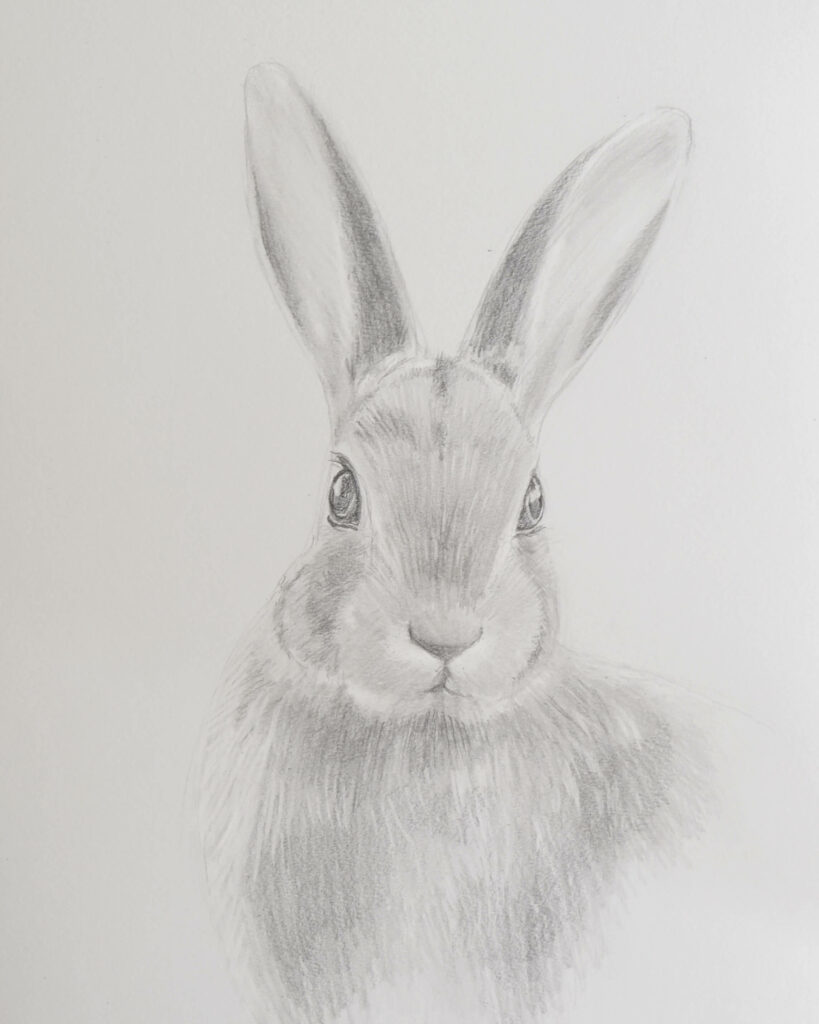
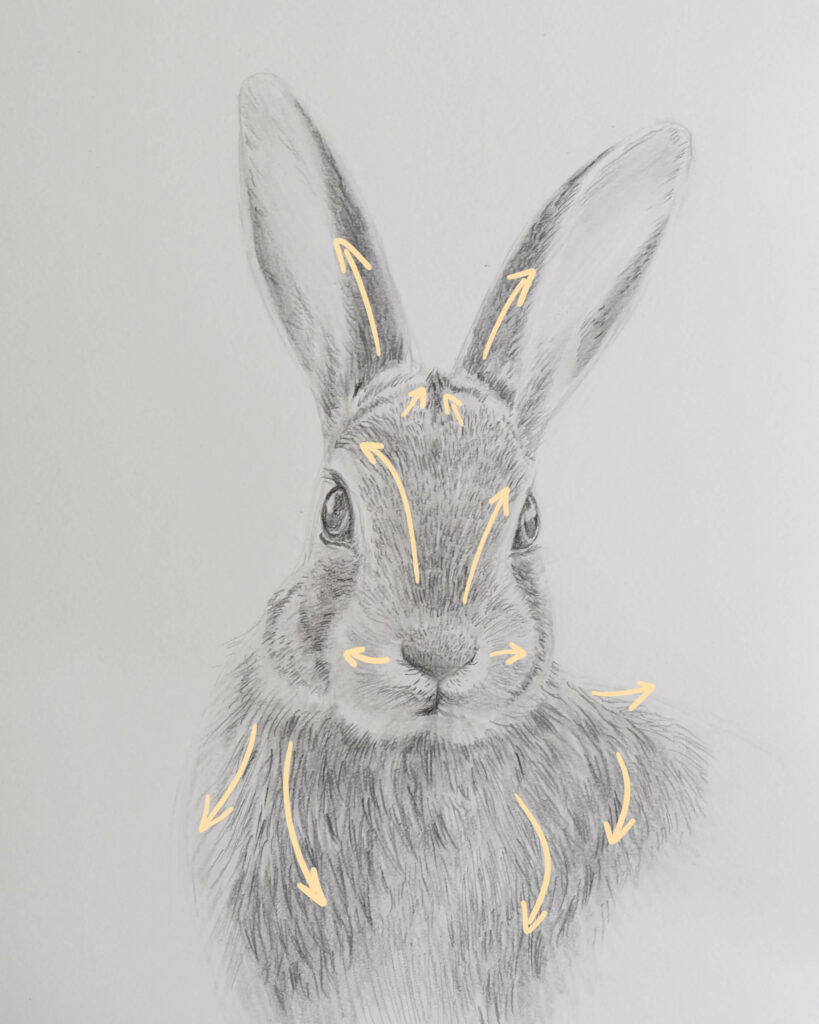
7. Drawing the rabbit’s fur with dark pencils
We can now draw in realistic fur. You have already laid the foundation for this in the previous steps. Use an extra dark pencil – upwards of 4B – and start to draw lots of individual hairs.
The rabbit’s fur on its head and ears is much shorter than on its body. This means that your strokes on the head must be short and the strokes on the body a little longer and more curved.
In fact, the fur on the nose is so short that you should almost draw dots instead of lines.
Pay attention to the direction the fur grows in! Not all hairs flow in the same way. You should also make this visible in your drawing. Look at this picture for reference:

8. Add some contrast to your rabbit drawing
Give your drawing more depth by making the black areas even darker with a black colouring pencil. This increases the contrast between light and dark areas, making your drawing much more realistic and three-dimensional.
TIP: Use an opaque black colouring pencil to draw black areas. Crayons are opaquer and more matt than pencils.
The darkest parts of your drawing will attract the viewer’s attention first.
Therefore, you should give the eyes, nose and mouth a lot of black. The eyes will become much deeper and more realistic.
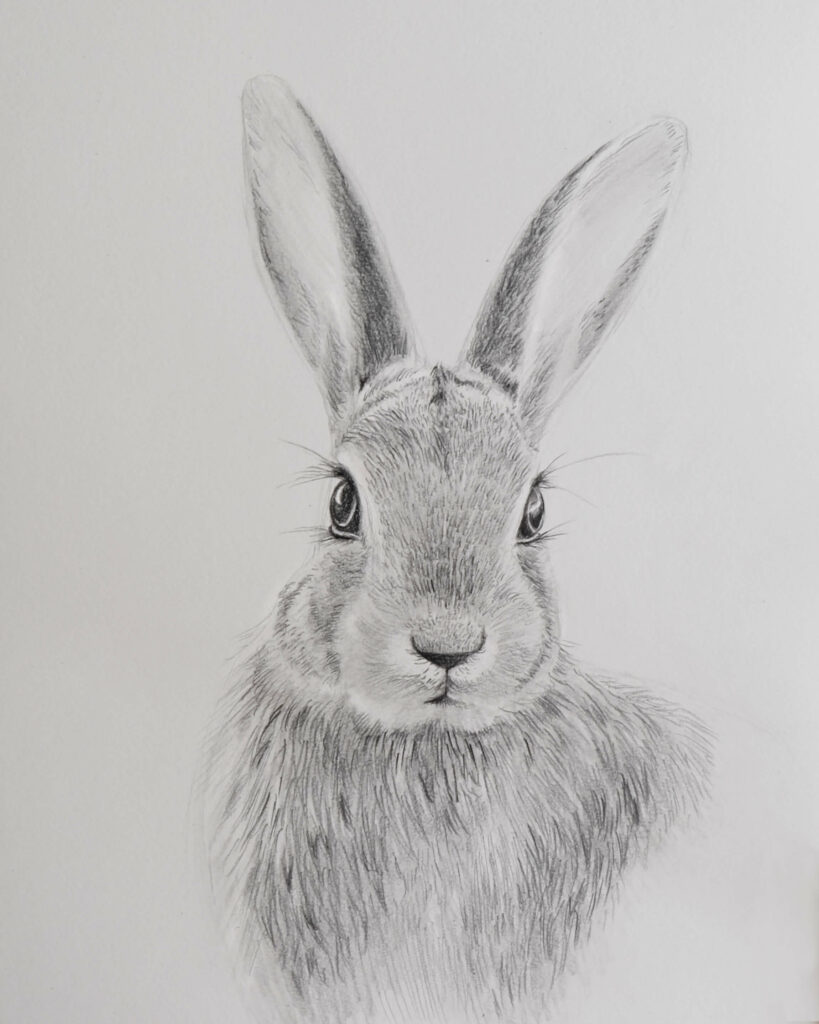
9. Draw some details to make the rabbit look more realistic
In the last step you can add a few more details to your rabbit.
For example, we cannot forget to include the long, protruding whiskers that are characteristic of a rabbit. Because these long hairs are very thin and rather light, you should use a hard pencil (H). A hard pencil does not get dull as quickly. This will help you to maintain a constant stroke width.
Move the pencil across the paper in dynamic, fast motions. Press firmly at the beginning of the stroke and then release (reduce pressure) towards the end of the stroke. This way your strokes will be evenly curved and thinner towards the end.
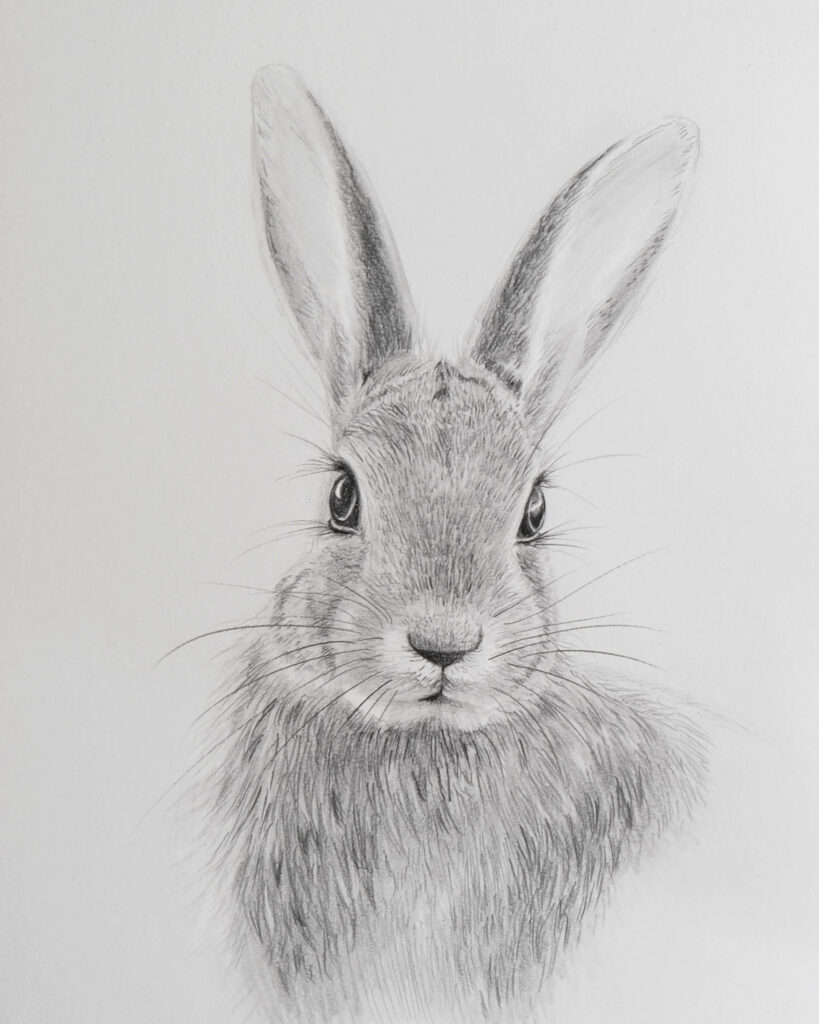
Here is my finished piece:
I hope you enjoyed drawing this as much as I did. I would love to hear how you got on. You can write me a message or tag me on Instagram !
Maybe you’re also interested in these tutorials: My best tips for pen and ink drawings How to draw skin tones
I made another rabbit drawing some time ago
If you like, you can also watch a timelapse of the drawing process further down 🙂
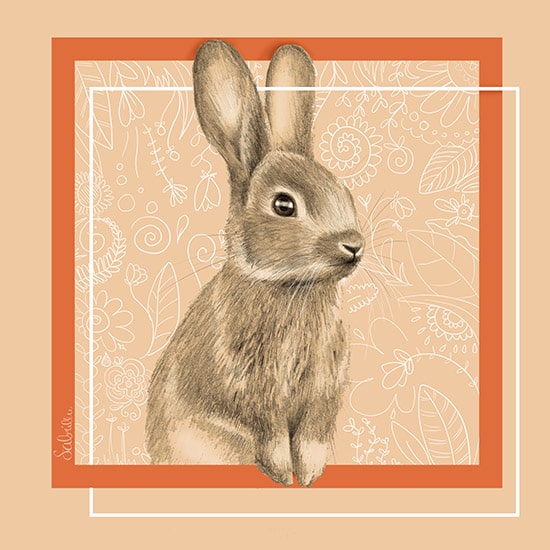
Here you can see my finished drawing (after I added an orange background and a frame with Photoshop).
Scroll down for the video!
How I draw a rabbit with pencils
Although many people are afraid to try it, animal studies are an excellent exercise to develop drawing techniques. Drawing the fur, for example, seems impossible to many. Actually it is not that difficult, if you build up the fur piece by piece in layers. In this time-lapse video you can see how I draw the first layer of the rabbit very brightly with a rather hard pencil. Gradually, I then use increasingly softer pencils to reinforce the darker areas and thus build up the contrast. With the eraser I set highlights (places where there is a lot of light) or erase individual hairs so that they stand out from the darker layer.
Used materials:
- pencils (HB – 9B)
- black coloured pencil
- blending stump
- eraser
- pen eraser
I hope you enjoyed watching my video and maybe you feel inspired to draw a rabbit with pencils too! I’d love to hear your thoughts and questions in the comments below 🙂
Here’s a photo you can save to your Pinterest.
Check out my boards on Pinterest!
I’d be happy to hear from your results! Feel free to tag @sabrillu_ on your picture on Instagram, so I can see your drawings!
kunstkitchen
Posted at 03:39h, 21 MayPrecious and well done!
Sabrina
Posted at 17:30h, 21 MayMany thanks ❤️
Sabrina
Posted at 14:10h, 26 MayThank you so much!
kunstkitchen
Posted at 20:21h, 26 May