
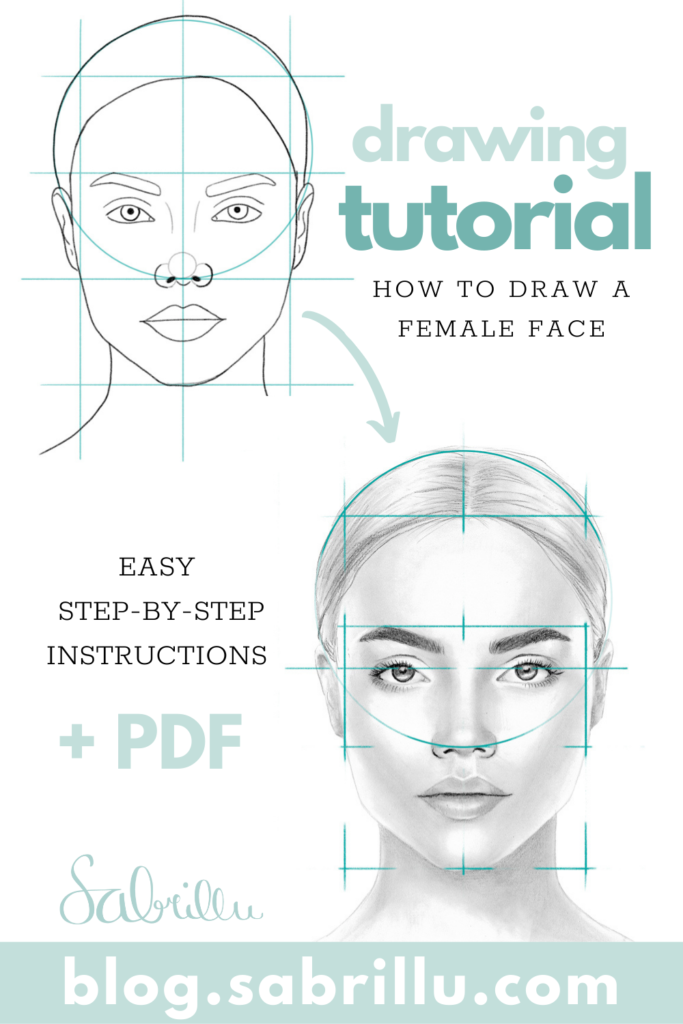
19 Feb How to draw a female face
Learn how to draw a beautiful female face with the right proportions
Easy tutorial with step-by-step instructions
In this tutorial you will learn how to easily draw a basic female face with the right proportions step-by-step.
In the past few years a lot of people have asked me to write a tutorial about facial proportions. When I asked you guys on Instagram what your greatest struggle is, the answer that came up the most was: “proportions”. “The eyes always look different” and “I never get the nose right” were the things you complained about.
Well, here I want to show you an easy solution to this problem by sharing my strategy on drawing a basic face with construction lines.
NOTE: I’m going to show you some basic guidelines, but always keep in mind that everybody’s face is laid out differently. They might be very close to these facial proportions – or they might be pretty different. At the end of the article you’ll find a photo of myself with guidelines to show some of these slight variations.

This tutorial is for everybody! You don’t need any prior knowledge or experience for this.
So without further ado, let’s just jump right into it!
Materials:
- Pencils
- Paper
- Eraser
- Ruler (optional)
Overview of the steps to draw a generic female face:
Time required: 30 minutes
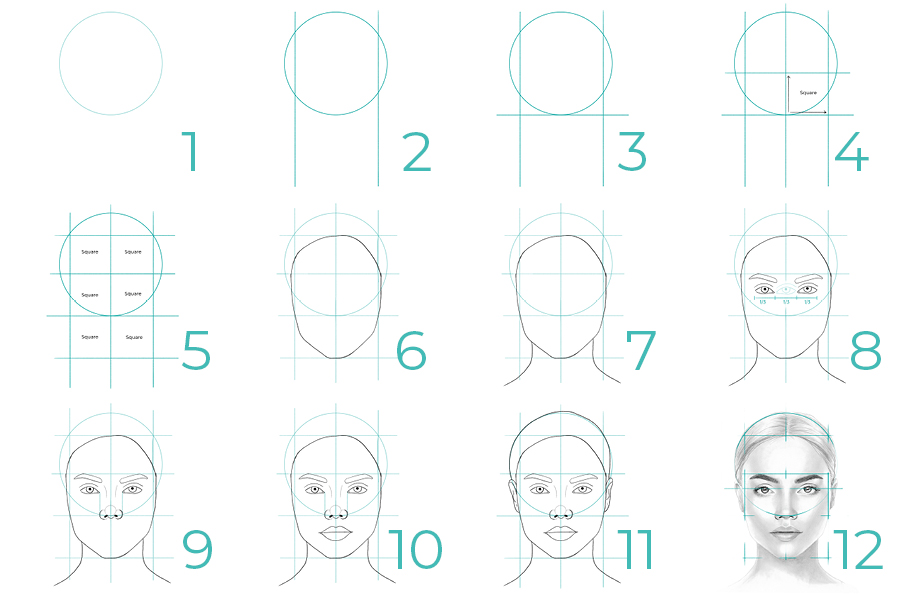
Here’s a quick overview of the steps we’re going to explore further later:
- Draw a circle
In the first step you will draw a circle.
- Cut off the sides
In the next step you’ll slice off the sides of the circle.
- Draw 6 equal squares
Next, you’ll add some more lines to create 6 equal squares. Now the basis for your drawing is done.
- Draw the contour of the face
In the 4th step you will draw the hairline, cheekbones and jawline of the face.
- Draw the neck
Add two lines to indicate the neck.
- Draw the eyebrows and eyes
Now you can draw in the eyes and eyebrows.
- Draw the nose
Next, you’ll add three circles to map out the nose.
- Draw the mouth
Then you can add the lips.
- Draw the ears and hair
You’re almost done! Now you can draw in the ears and the hair.
- Erase
In the last step, erase all guidelines.
Get your FREE PDF instructions!
How to draw a face step-by-step
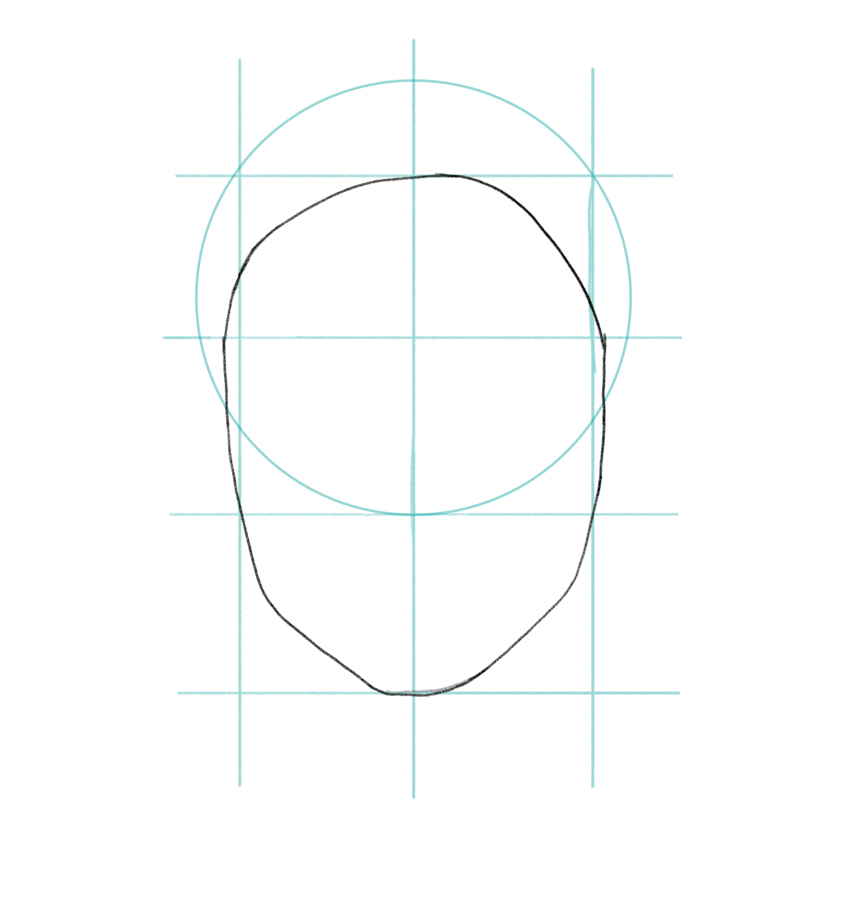
1. Draw a circle
We’re going to begin by drawing a circle. Don’t worry about being perfect at this point. You can refine everything later.
NOTE: Draw everything very lightly with an H or HB pencil, because we have to erase the guidelines later. We don’t want any lines dividing up our face on the final portrait.

Breaking down your motif into simple shapes helps you get the proportions right.
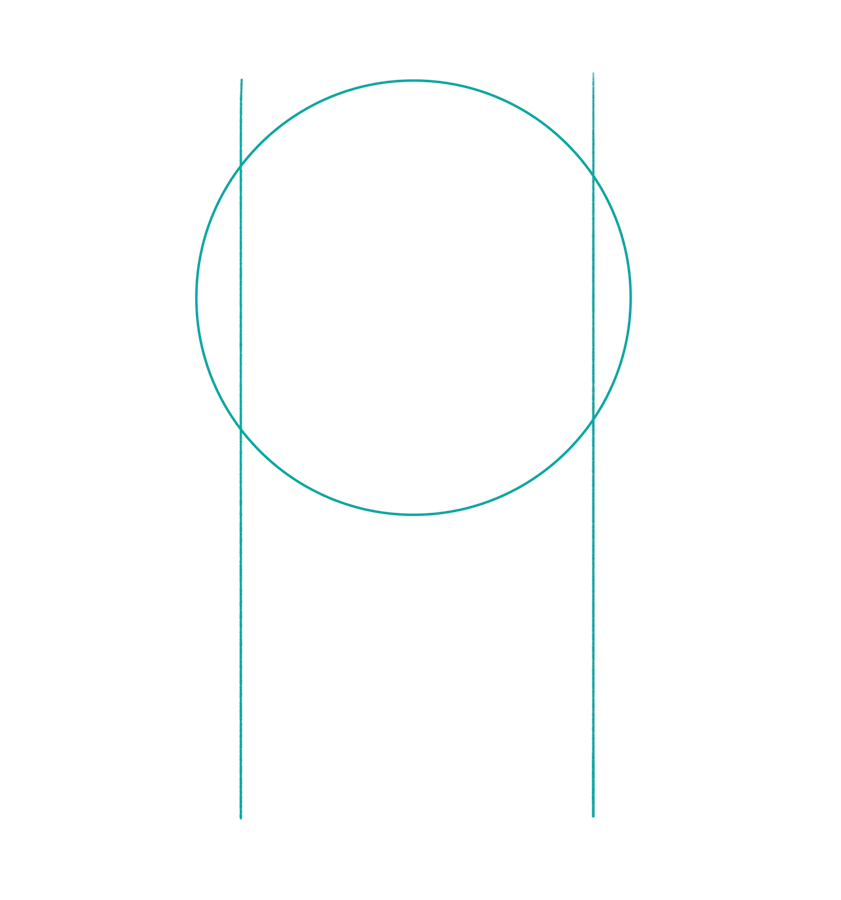
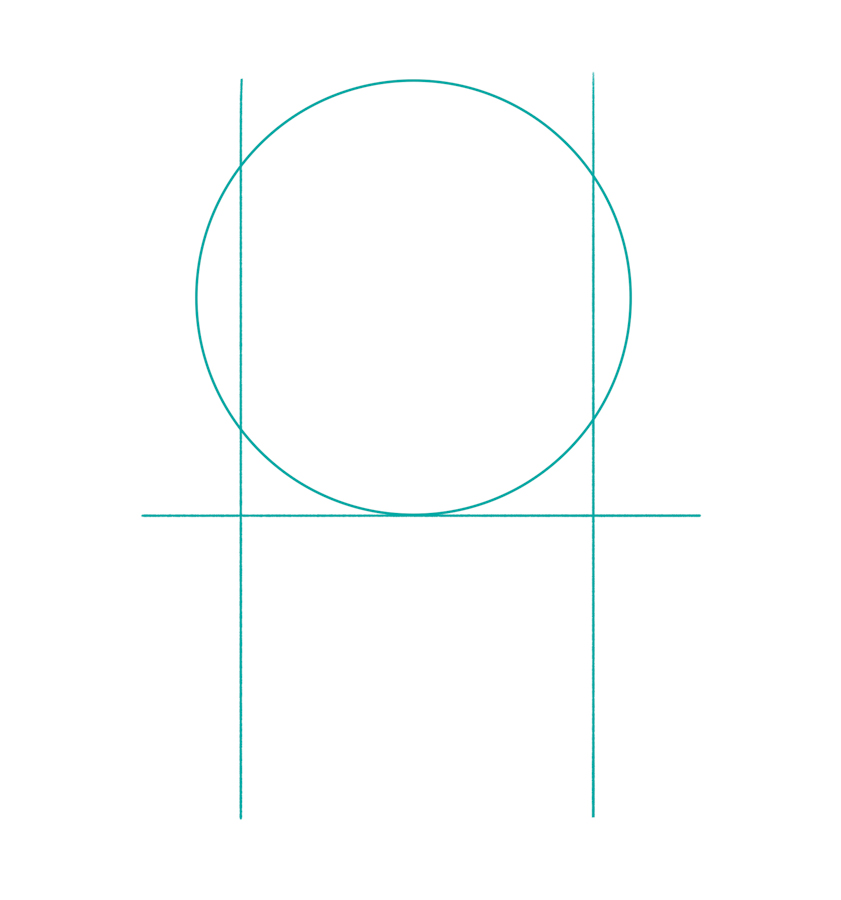
2. Cut off the sides
The next thing you need to do is slice off the sides of the circle.
Your sketch should look something like this:
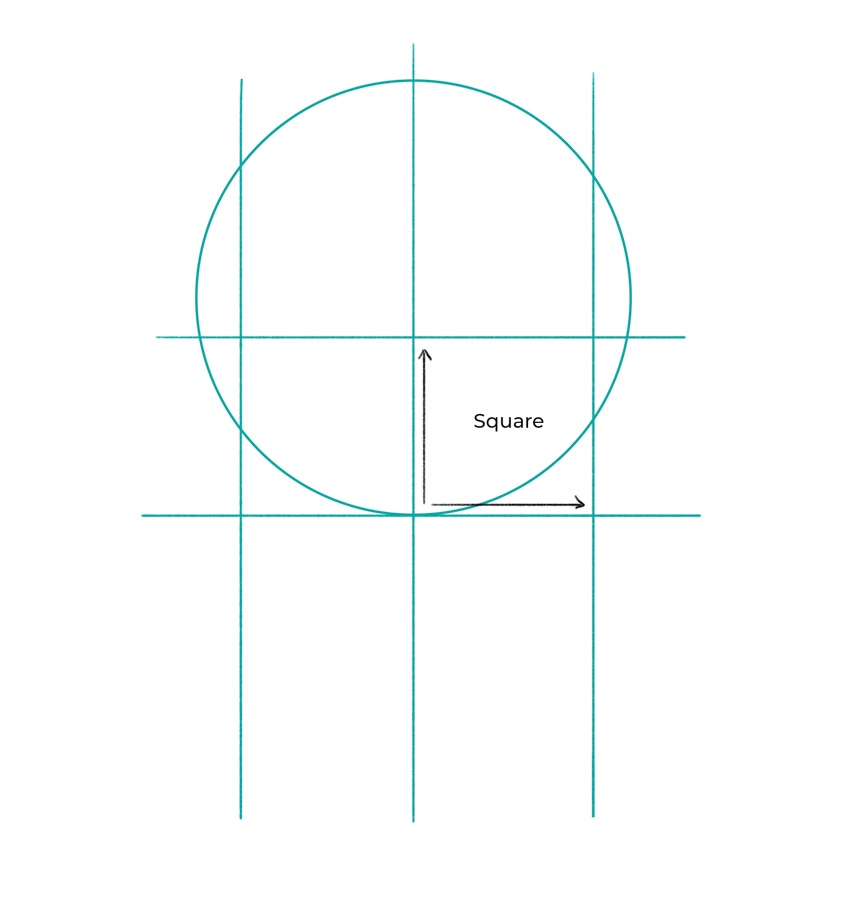
3. Draw six equal squares
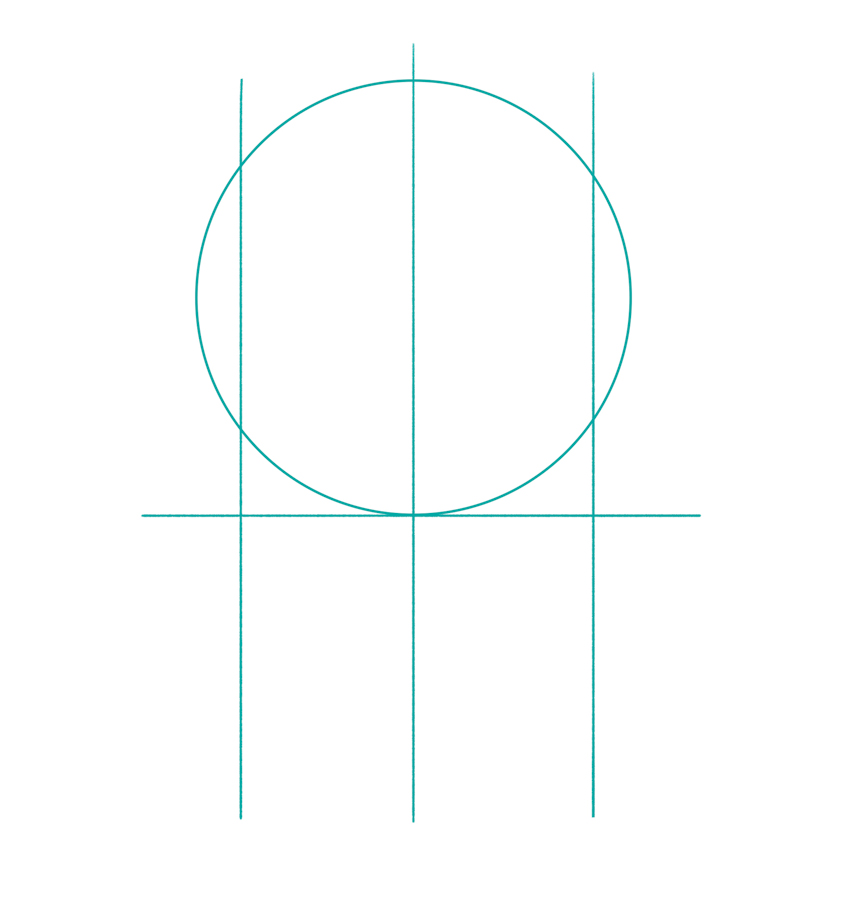
Next, add a horizontal line at the bottom of the circle.
Then, I want you to divide the circle in half vertically.
Now add another horizontal line above the bottom line. You should place the line so that it creates two equal squares.
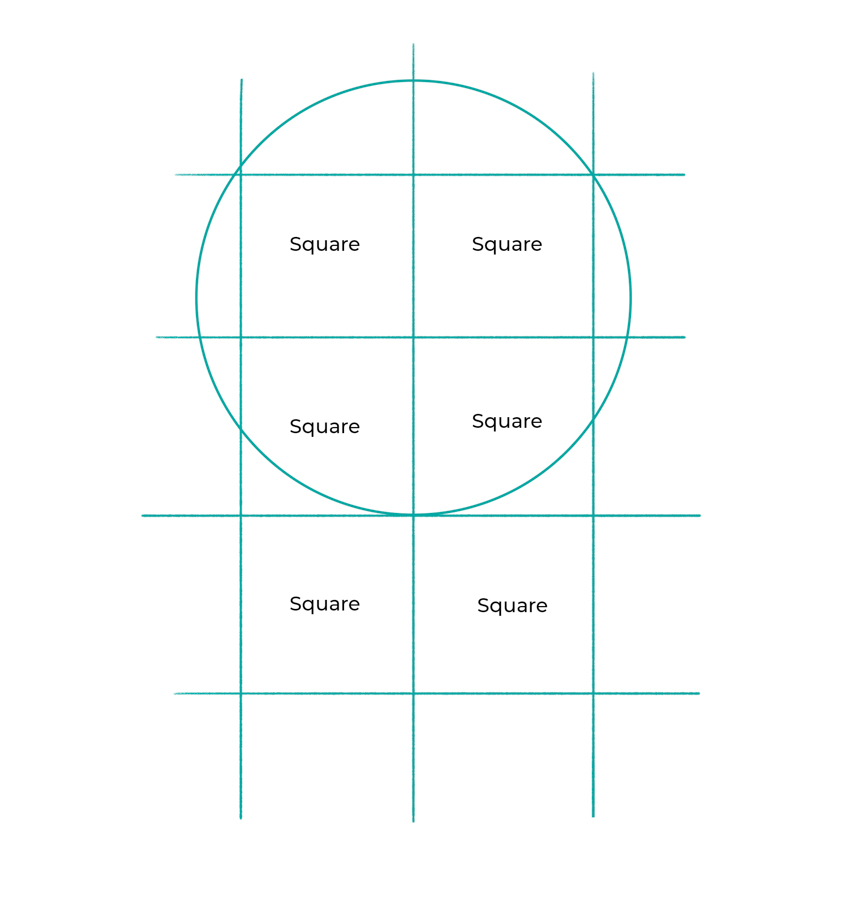
Repeat this one more time on the top and one more time at the bottom to create 6 equal squares. You can measure the distances for every square but you can also draw by eye.
The squares don’t have to be perfect. Remember, you’re just drawing rough guidelines.
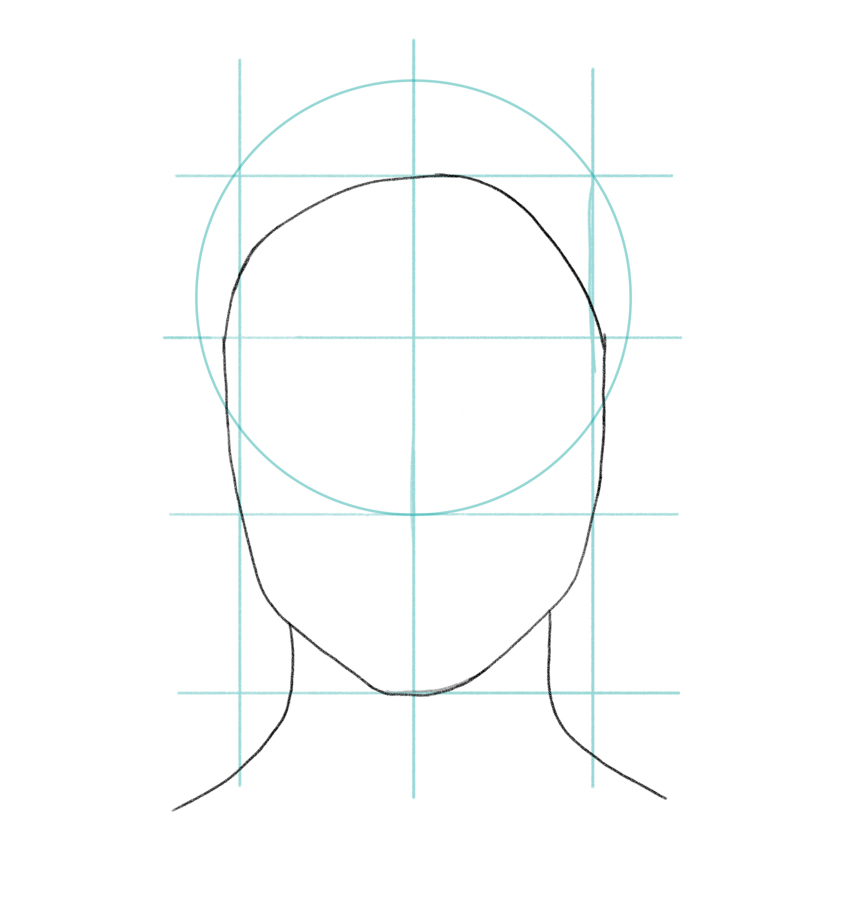
4. Draw the contour of the female face
At this point you can start drawing the contour of the face.
The hairline starts at the top horizontal line and the chin starts at the bottom line. Draw the jawline and cheekbones at the sides of the face and use the squares for guidance. Now the outline of the face is done.
5. Draw the neck
Next, add two lines from the jawline downwards to give the head a neck.
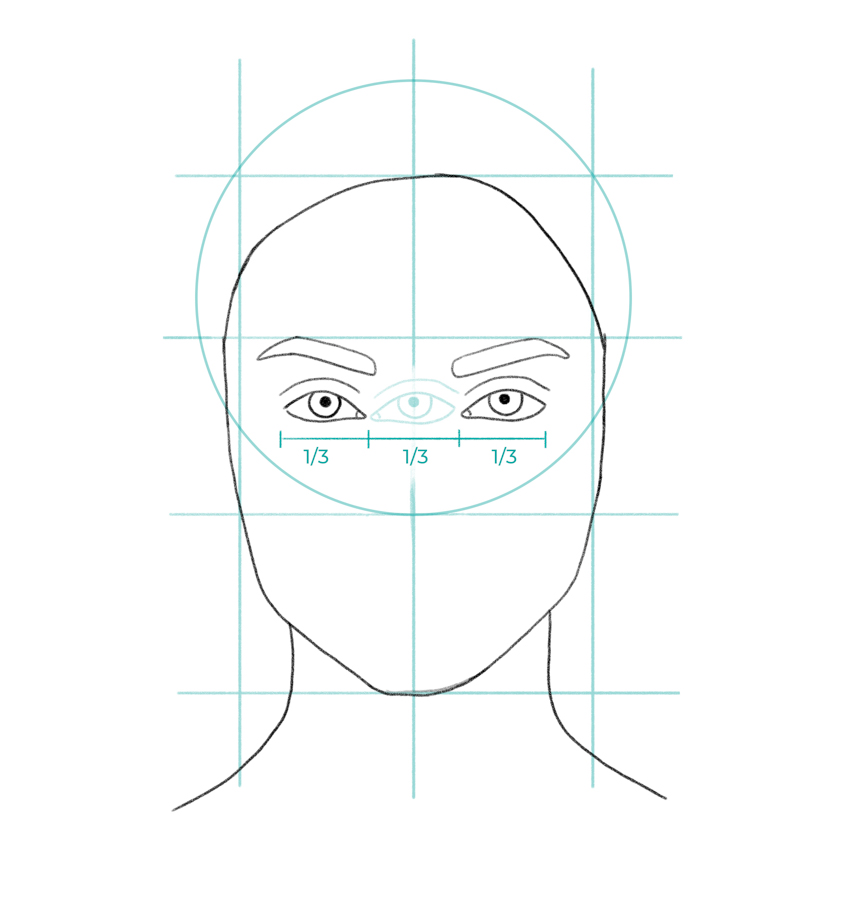
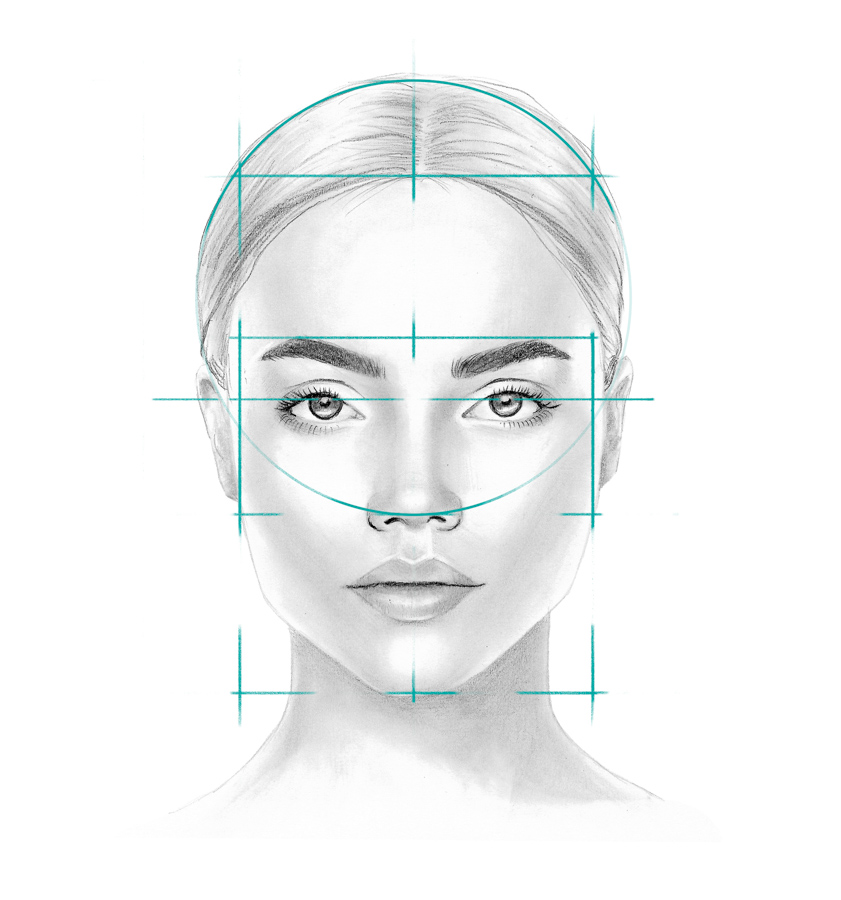
6. Draw the eyes and eyebrows of the female face
The next step is drawing the facial features. I always start with the eyes and eyebrows. The eyebrows are placed directly under the second line. Try to place them in the middle of the squares, leaving equal empty spaces on the left and on the right.
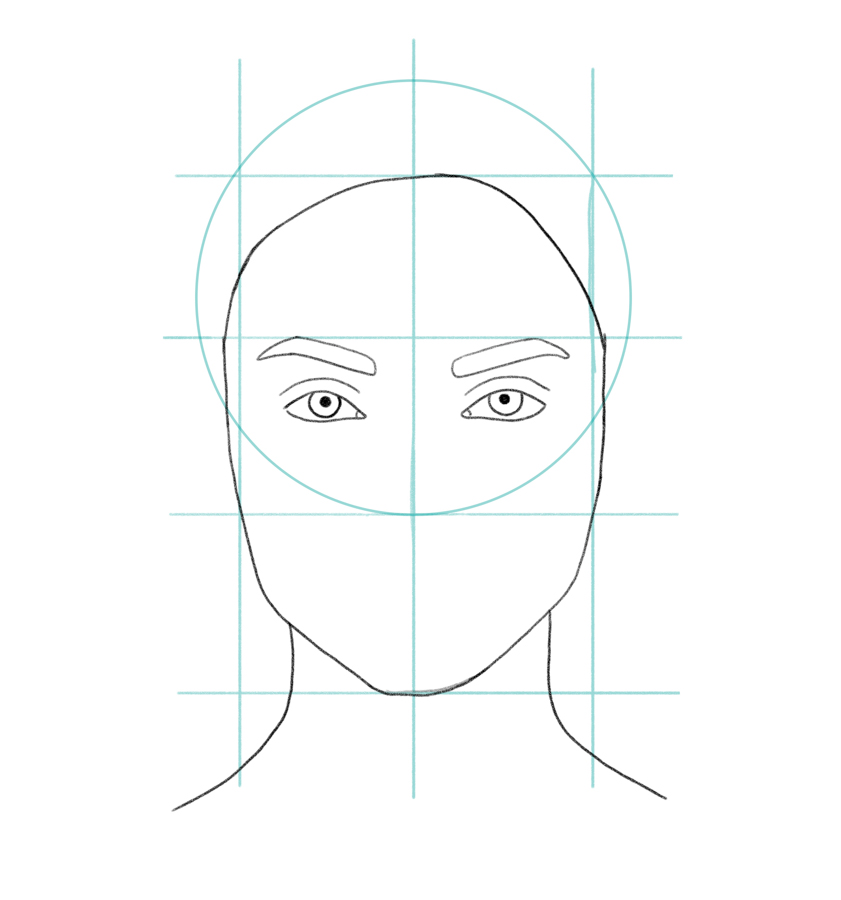
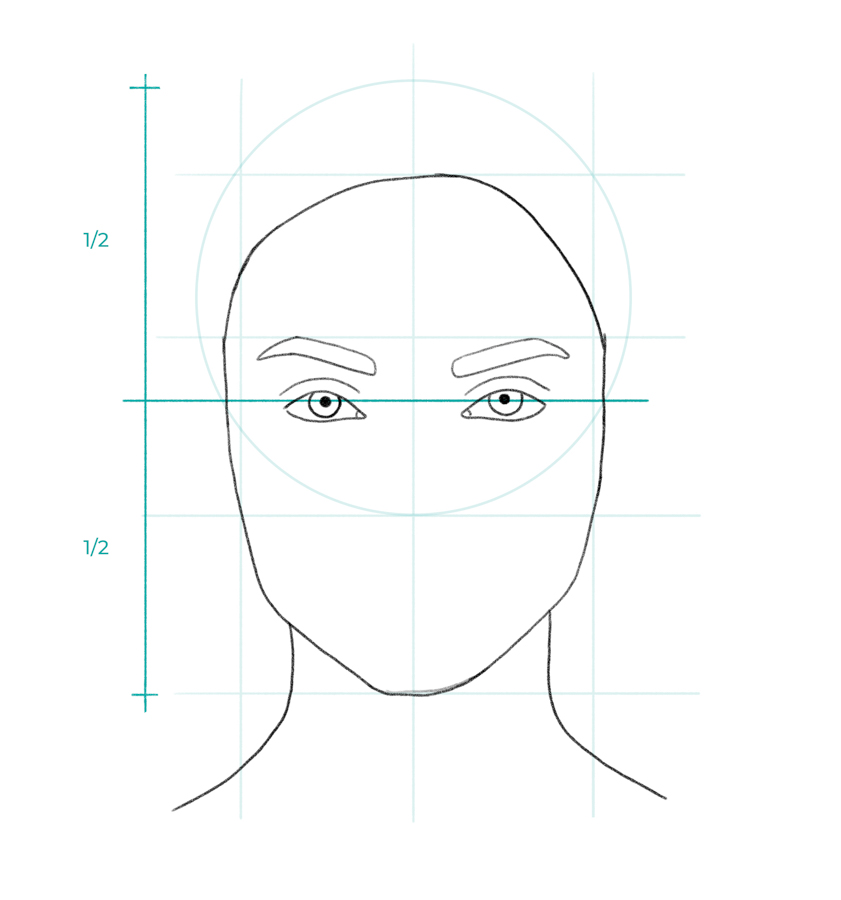
For the eyes you can draw an optional horizontal line which should divide the whole head (starting from the top of the circle down to the chin) in half. The pupils of the eyes should be placed on this line (see images below).
For the distance between the eyes, try to imagine another eye in the middle.
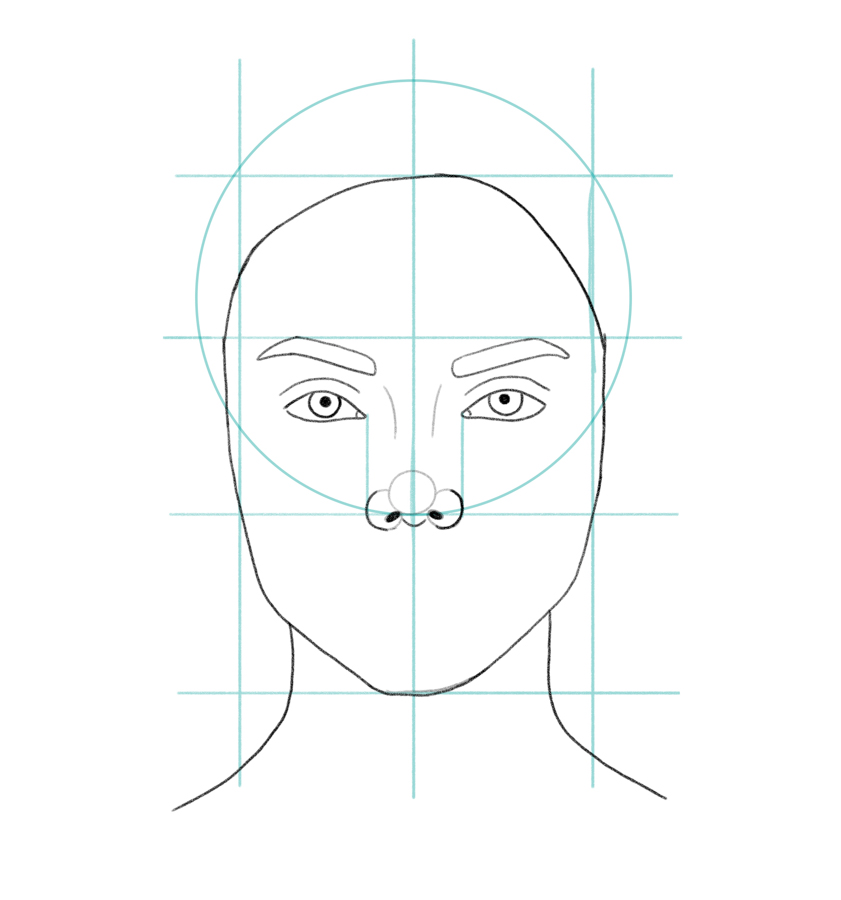
7. Draw the nose
Next, draw the nose.
To find the right position for the nose draw two vertical lines from the inner corners of the eyes down to the circle. This marks where the sides of the nose will end.
Draw a small circle in the middle for the tip of the nose and then draw two more small circles on each side for the sides of the nose. You can also draw to lines reaching from the eyebrows to the nose to mark the nasal bridge.
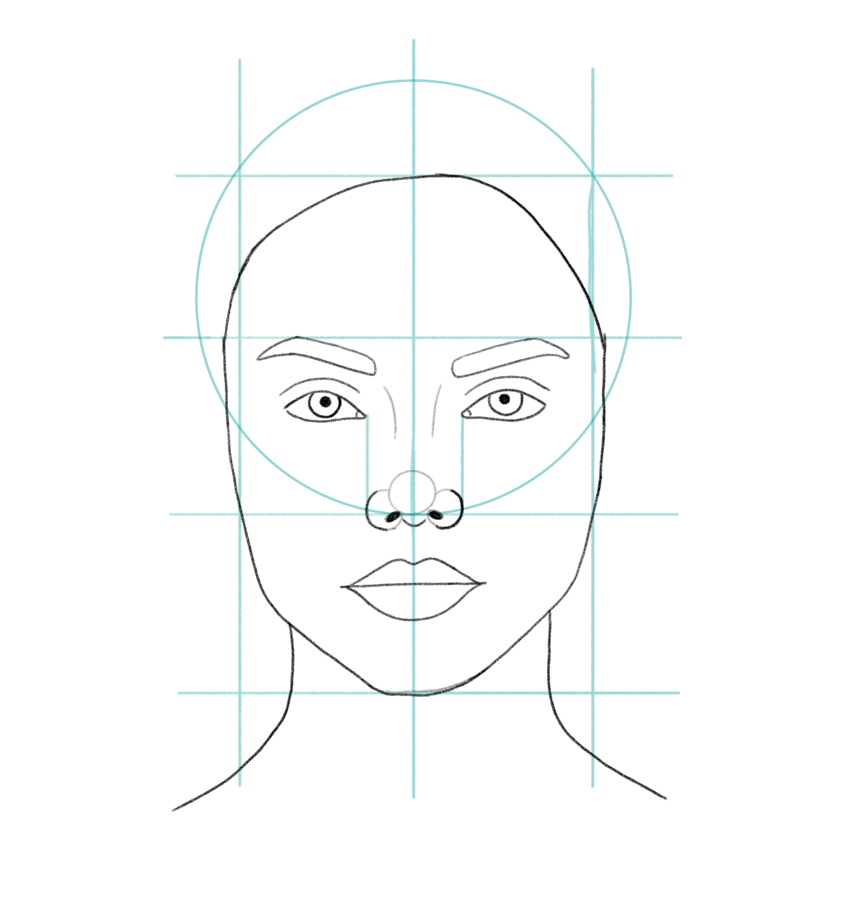
8. Draw the mouth
Draw the mouth in the next step. The mouth should be a little wider than the nose and the line between the lips should be relatively straight.
9. Draw the ears and hair
Now we’re almost done! In the next step, draw in the ears and the top of the head. The ears are positioned right in the middle of the squares. And for the top of the head you just have to trace the circle. Depending on the hairstyle you’re choosing, this line can vary.
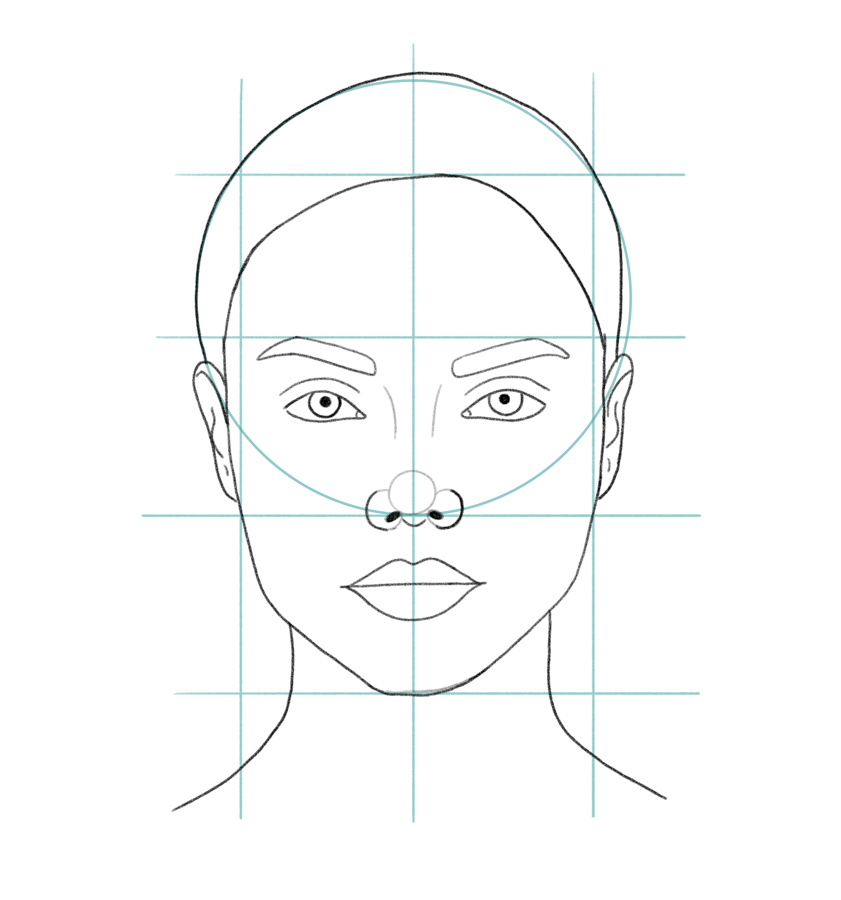
That’s it! You’re done with the basic sketch. Now erase all construction lines.
Because people look different and facial features will not always look the same you can use this basic sketch as a starting point to further define your portrait. Allow yourself to play around with the facial features and create a character that is unique!
Here’s also a shaded version of this generic face – feel free to complete your portrait sketch using this as a guide for shading. If you’d like another tutorial on how to shade a face, let me know down in the comments!
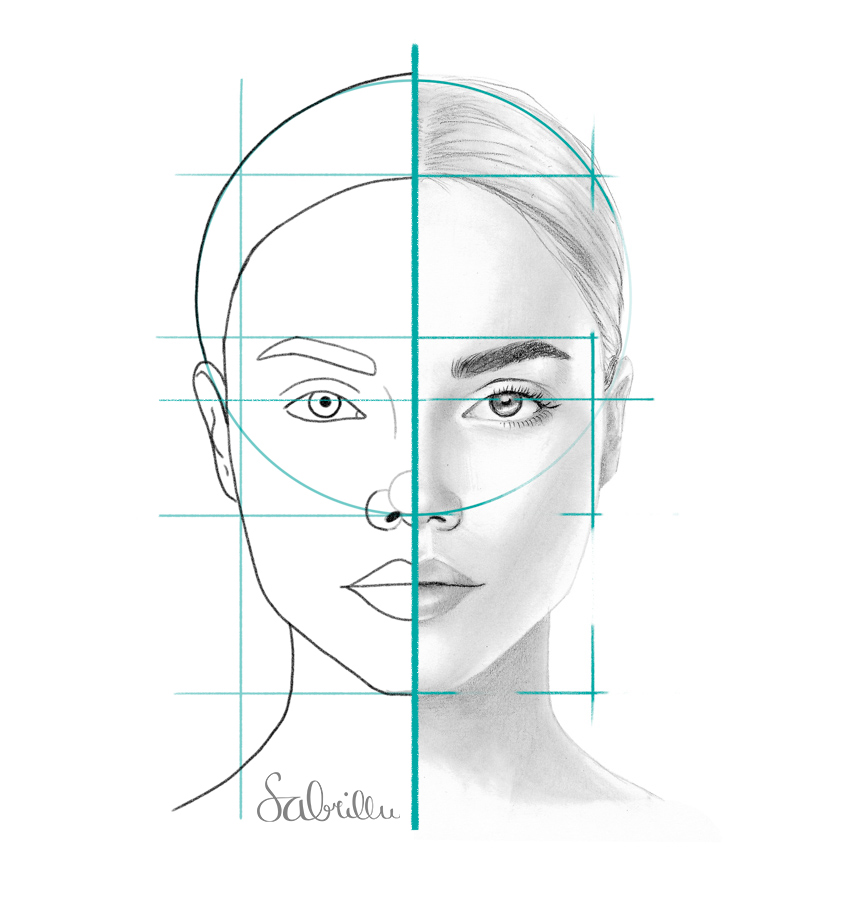
Reality check
As promised at the beginning, I also want to show you that these guidelines don’t apply to every face. Have a look at this photo of me for example. My face is thinner, and also the space between my eyes is smaller than in the portrait sketch. Naturally my mouth is a lot wider because I’m smiling.
This tutorial is designed to give you a better understanding of facial proportions. But what I want to emphasize is: Don’t let these guidelines limit your creativity.

Hope you liked this tutorial! I’d love to see your drawings, tag me on Instagram so I can see them (@sabrillu_)
If you’d like another tutorial on how to shade a face, or how to draw a generic male face, let me know in the comments below!
Do you use Pinterest?
Save this image to your board to find it later:
About me

I’m Sabrina Hassler, an artist from Austria. I love drawing detailed pencil drawings of both people and animals. I work with publishers and advertising agencies any many of my illustrations appear in books or on various products. Apart from drawing, I enjoy sharing my knowledge and techniques with other creative people. On this blog I share drawing tips and tricks and helpful resources for you to practise what you have learnt. Take a look at my portfolio of different works.
Maybe you’re also interested in these tutorials: My best tips for pen and ink drawings How to draw skin tones
No Comments